Home Hardening Guide (2026): Physical Security to Deter and Delay Burglars
Updated July 2026 · Silent Security Research Team
Home hardening uses the principles of Crime Prevention Through Environmental Design (CPTED) to make your home a hard target - one that requires too much time, effort, and noise to be worth the risk. Burglars are opportunists: they look for the easiest target, not the hardest. Hardening doesn't need to be expensive to be effective.
The CPTED Framework
CPTED is a multi-disciplinary approach used by law enforcement, architects, and urban planners to design environments that deter crime. For homes, it focuses on four principles: Natural Surveillance (can you and neighbors see what's happening?), Natural Access Control (can unauthorized people easily get in?), Territorial Reinforcement (does the home clearly signal it's owned and monitored?), and Maintenance (does the home look cared for, or abandoned?)
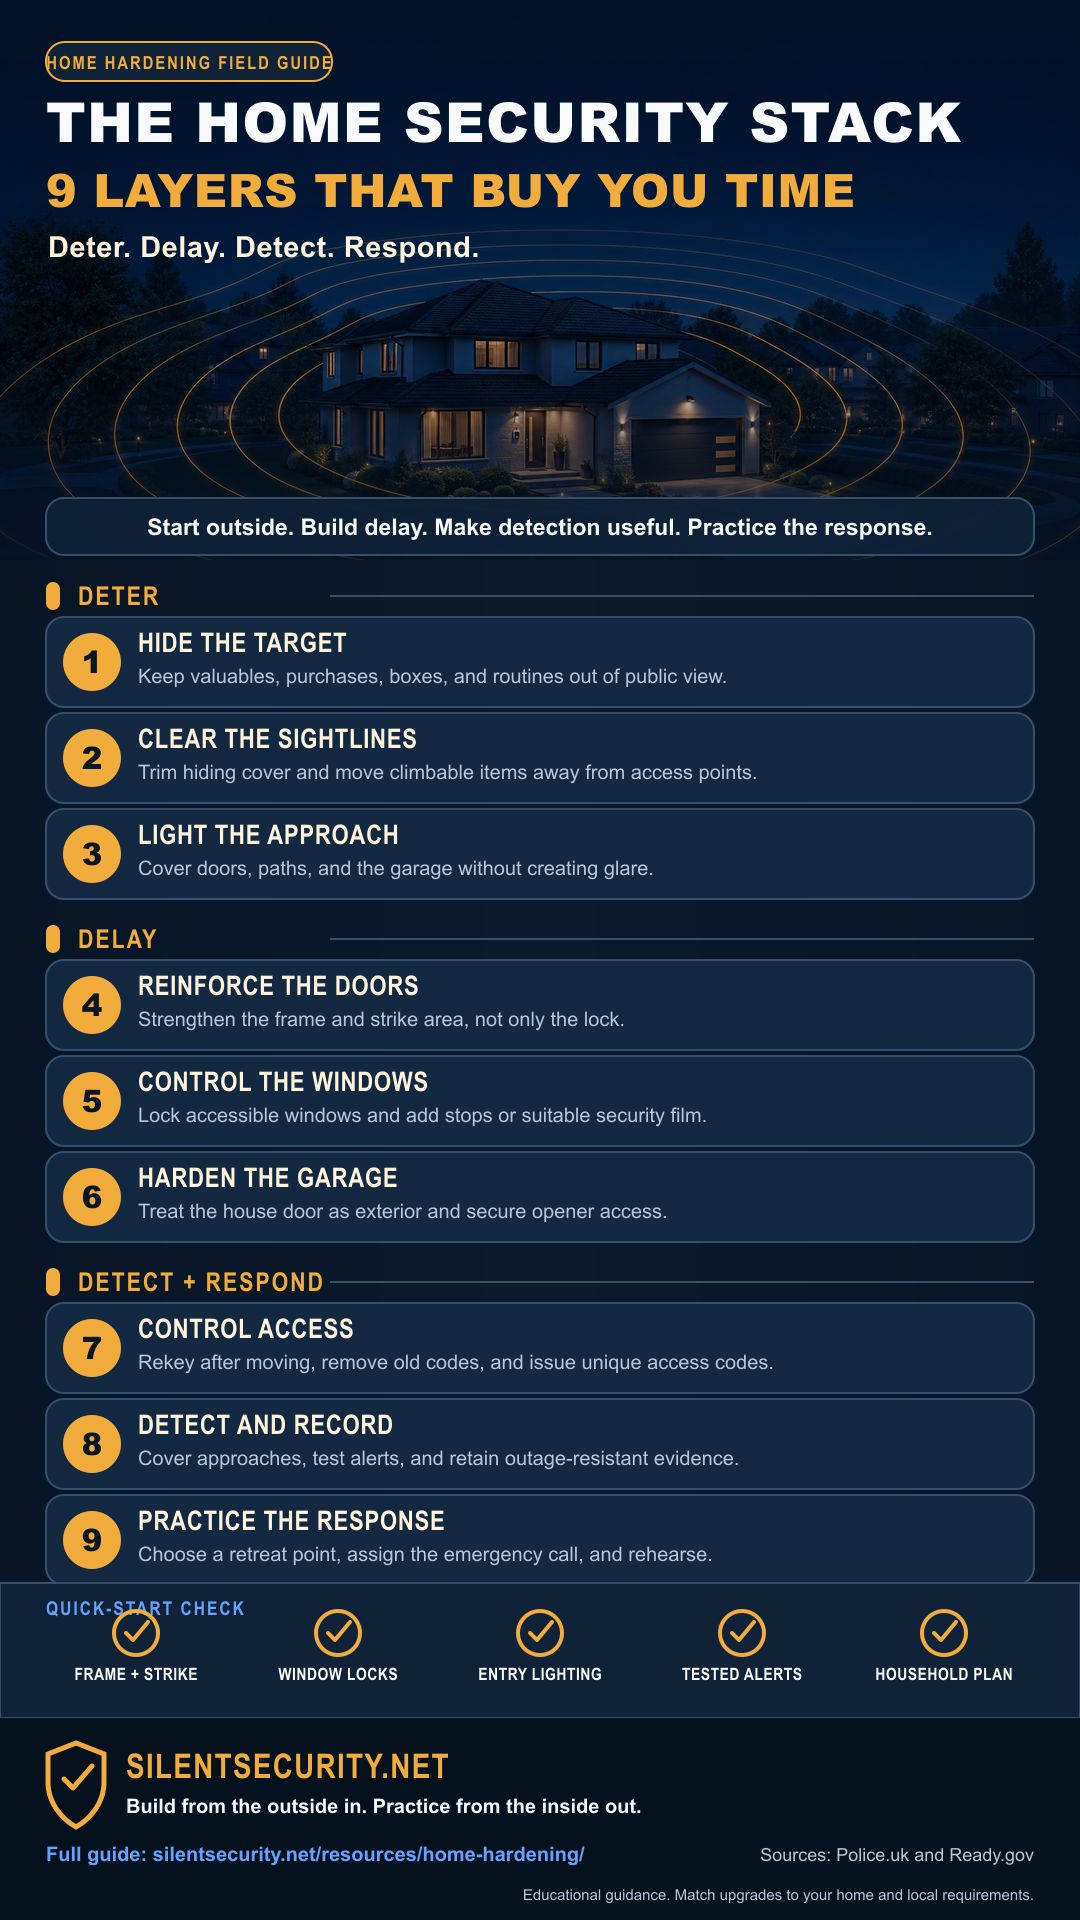
The Home Security Stack: use this saveable checklist with the detailed guidance below. Door and window recommendations are informed by Police.uk door and window security guidance and its window security guidance. The response layer follows Ready.gov household planning guidance.
Layer 1: Exterior Perimeter
Landscaping and Natural Surveillance
- Trim shrubs and bushes to below window height - eliminate hiding spots near entry points
- Maintain clear sightlines from the street to your front door (natural surveillance)
- Use thorny plantings under windows: roses, barberry, holly, hawthorn - a cheap but highly effective deterrent
- Gravel or crushed stone along the foundation and under windows - noise alert if someone walks through
- Well-maintained yard signals occupancy and attentiveness (a neglected home signals an absentee owner)
- Motion-activated lighting at all entry points, corners, and pathways
Layer 2: Door Security
The Door - Your Most Critical Entry Point
A door is only as strong as its frame, strike area, hinges, and installation. A solid door can still fail when short fasteners or a weak jamb carry the impact instead of the wall framing.
- Door-frame or strike-area reinforcement - use a suitable reinforcement plate and fasteners that reach structural framing, following the product instructions and local fire and building requirements
- Replace short screws in hinges with 3-inch screws reaching the stud
- Solid core or metal door - hollow-core doors can be breached with a fist
- Grade 1 deadbolt (ANSI Grade 1 is the highest rating - look for it on the package)
- Door reinforcement bar or security bar (Door Club, Buddybar) for sliding glass doors and as backup
- Wide-angle door peephole or video doorbell (Ring, Nest, Eufy)
- Door alarm sensor connected to your security system or standalone alarm
- For sliding glass doors: security bar in the track + pin through both frames at the top
Layer 3: Window Security
Windows - Second Most Common Entry Point
- Window pins or sash locks - prevent windows from being opened from outside even if the standard latch is defeated
- Window break sensors on all accessible windows
- Suitable security window film can help hold broken glass together and add delay when correctly selected and installed; preserve required emergency egress
- Window bars/grilles (for ground floor in high-risk areas) - must have quick-release mechanism inside for fire egress
- Thorny bushes under windows (most cost-effective external deterrent)
- Keep valuables out of sight from windows - visible items create targets
Layer 4: Lighting
Lighting - The Cheapest Force Multiplier
- Motion-activated floodlights at all entry points (front door, back door, garage)
- Cover all "dark zones" - sides of the house, pathway behind shrubs, driveway edge
- Smart bulbs on timers inside the home when you're away - randomize patterns, not fixed schedules
- Avoid lighting that creates glare toward the street (reduces natural surveillance from neighbors and passersby)
- Consider solar-powered pathway lighting - maintains light even during power outages
- Dusk-to-dawn porch light (minimum)
Layer 5: Garage Security
Garage - Often the Overlooked Entry Point
- Never leave the garage door open when you're not home or in the garage
- Lock the door between the garage and house - treat it like an exterior door (solid core, deadbolt, reinforced frame)
- Use a garage door lock or slide-bolt in addition to the automatic opener
- Don't leave your garage door opener in your car - if your car is broken into, they have access to your home
- Cover garage door windows so tools and contents aren't visible
- Install a camera covering the garage door and driveway
Layer 6: Security Systems and Cameras
An alarm system is not a substitute for physical hardening - it's what happens after the physical barriers fail. Cameras and alarms work together with hardening:
- Visible security cameras at front door, back door, and driveway - the camera itself is a deterrent
- Security system with door/window sensors and motion detection - provides early warning
- A yard sign or window sticker from a security company - studies show these reduce attempted break-ins even without a system (though an active system is always better)
- Smart doorbell with two-way audio - lets you respond to visitors remotely
- Door frame reinforcement kit (~$50) - Door Armor or similar; 3-inch screws into studs. Biggest single upgrade you can make.
- Replace deadbolt screws with 3-inch screws (~$5) - takes 10 minutes
- Window pins (~$10 for the house) - prevents windows from opening even if latches are compromised
- Motion-activated floodlight (~$25) - eliminates dark zones at entry points
- Thorny bushes under windows (~$15–$30 at a garden center) - a living security measure